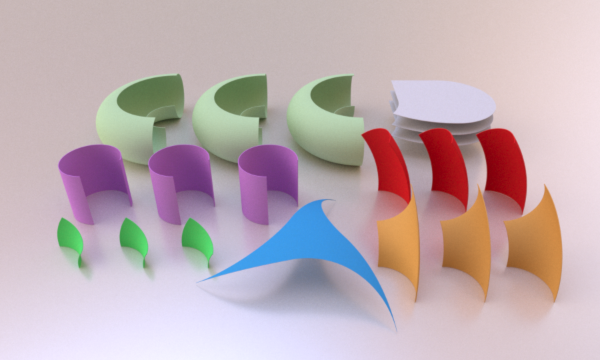
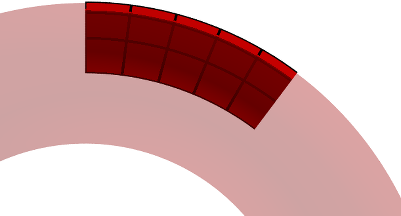
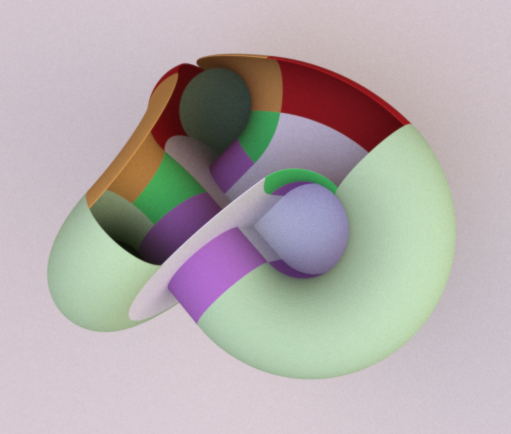
Take the following pieces
All pieces are obtained from the folowing primitive shapes: tori, cylinder, planes, and a sphere, and elementary operations: intersection, difference, union, ... (that's constructive solid geometry). Now glue them together as follows:
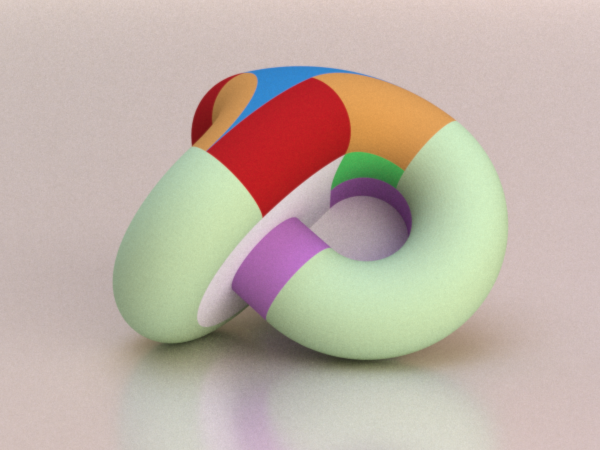
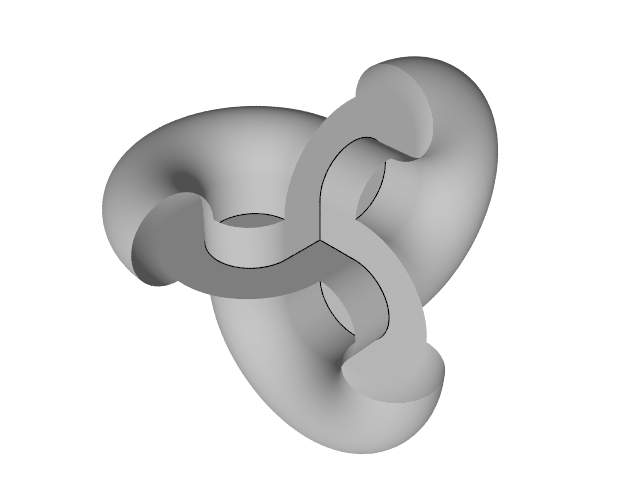
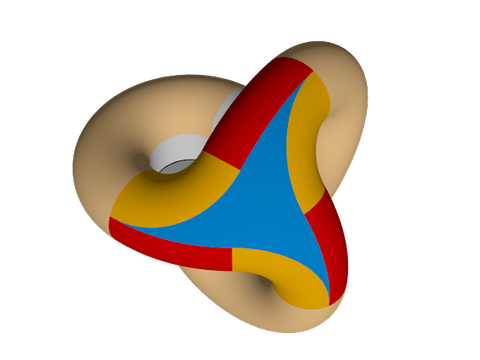
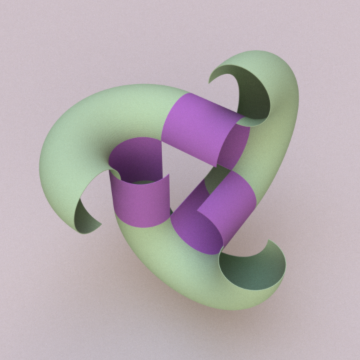
Then you get a model of Boy's surface.
Note: The purple cylinder traverses the white flat pieces and the latter also cross each other. This is normal since Boy's surface is an immersion and not an embedding. To actually build the object one must first either slit or subdivide those pieces beforehand (one may reduce the cuts in the white pieces by slicing the cylinders in halves first).
Note: By a torus we mean a geometric torus: the surface of revolution based on a circle.
Note: This model is C1, in the sense that there are tangent planes at all points and the normal varies continuously with the point. It is not C2 since the curvature does not vary continuously. (Refining even more, we can say it is C1+Lip, i.e. the first derivative is Lipschitz-continuous, which is pretty close to be derivable).
Let me explain how one can come across this.
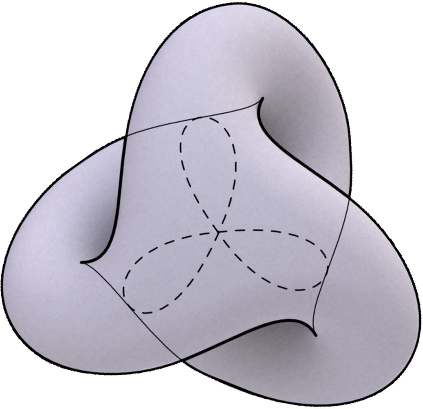
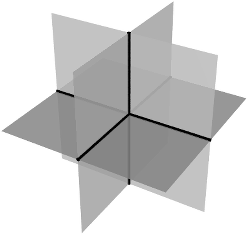
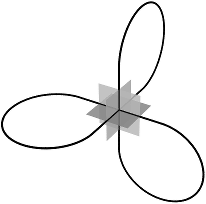
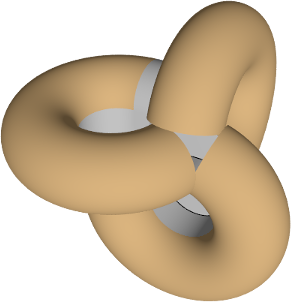
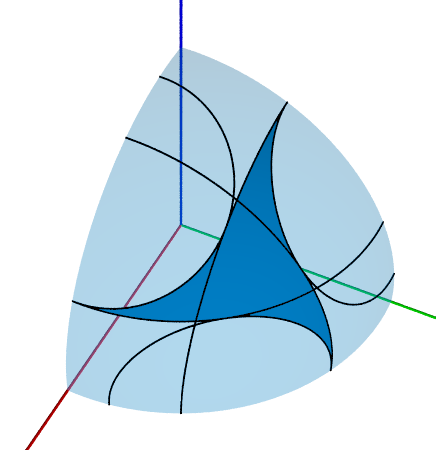
An often used starting point, for a description of Boy's surface, is its self-intersection curve (the dashed curve above). It has a trefoil shape, but the triple point is the intersection of three pieces of surfaces with independent positions: it is thus the union of three curves with tangents that do not belong to the same plane. We may as well choose the three pieces of surface to be pieces of three orthogonal planes:
We can then complete the curve using three pieces of circles.
From now on we choose the scale so that these circles have radius 1. Now add germs of extensions.

Let us grow this to a certain point: the strip will reach width 2.
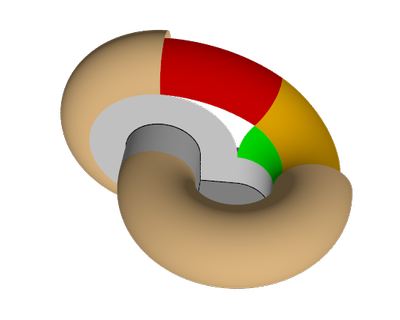
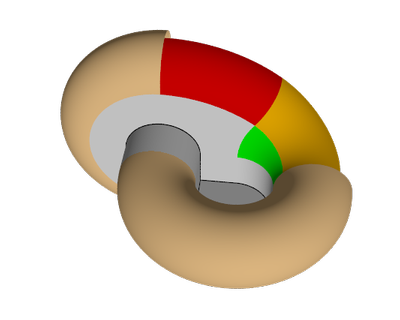
This has filled the holes in the loops and we reached a point where this can be completed with three identical pieces of tori. Here with one:
The piece is a torus where the inner circle is only three quarters complete, and the outer circle is only half complete (i.e. it is sliced by a plane containing its axis). The minor radius of the torus is 1 and the major radius is 2 (so its distance from its revolution axis spans between 2-1=1 and 2+1=3, its diameter is 6). Here is the picture with all three pieces added:
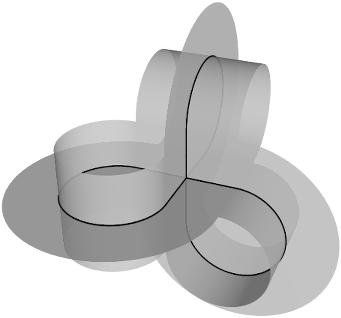
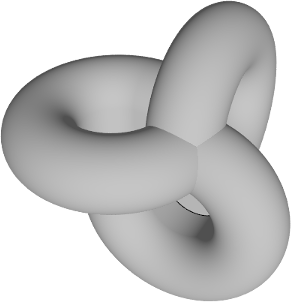
So we obtained this cut open version of Boy's surface, which is nice because it illustrates quite well the structure.
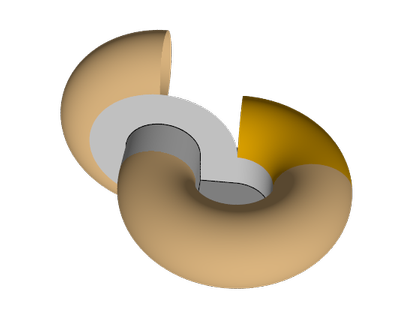
However, we want to close it completely. The first idea would be to use a bigger part of the tori...
... but they do not fit well. Here is the trick. Below is another view on the surface, with one torus piece continued by 90 degrees.
The supplementary part is now rotated by some angle to be determined later, call it A.
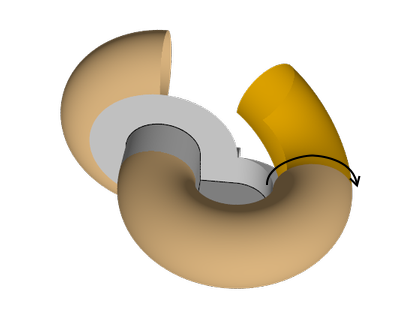
We have kept too much of the minor angle of the orange part, so we will remove some of it, by an amount to be determined later.
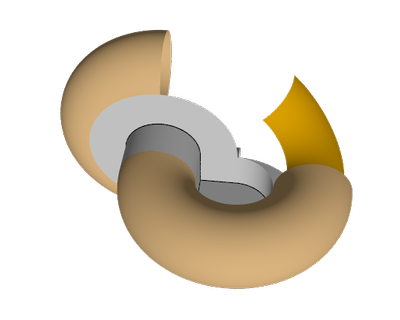
The gap can be filled by a piece of a torus with the same minor and major radius (1 and 2) but whose axis lays horizontal. Indeed, imagine a continuous rotation for the yellow piece. One of the quarter circles on the yellow piece rotates and sweeps piece of a torus.
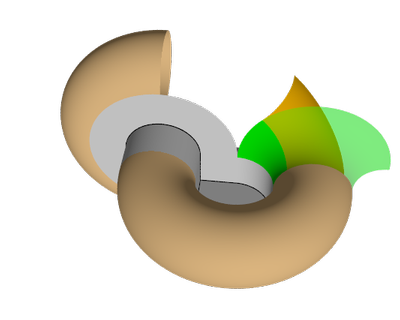
Now the yellow piece has an edge facing the which is part of a circle of radius 1, and we would like to connect it to the vertical half torus piece that it is facing, using a red piece of torus:
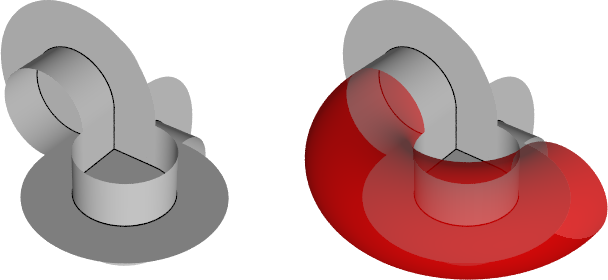
The red piece has to connect with the half torus on its left, so its minor radius will be 1. Its major radius has to be chosen well so that it touches the orange piece as on the picture above. The red and the orange pieces will fit nicely only if the angle of the sweep in the green part is well chosen. This can be translated into a simple and nice geometry problem in 2D and determines the value of the angle A. Note that if the sweep > A, then there will be a little gap as on the picture above. We could fill it with a piece of sphere. However we use later a nice way to close the surface that only works if this gap is absent.
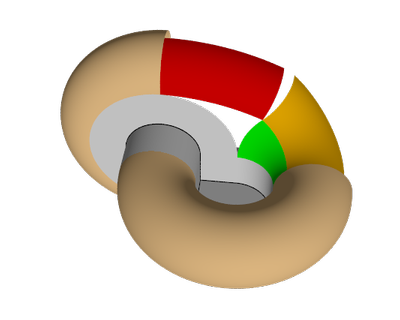
The gray flat piece extends to the red and green pieces to fill another hole:
Let us now look at the front again. For a good fit, we choose the angle of the inner circle of the yellow piece and of the red piece to be the same. Let us call it B.
We can choose the angle B so that the red and yellow pieces touch further: there are a green a yellow and a red piece attached to three quarters of a circle of the initial torus. They respectively span an angle of A, B, B, and 270°. Hence if A+B+B=270° there will be no part left on the circle:
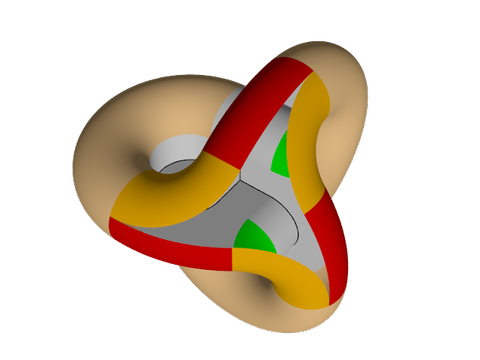
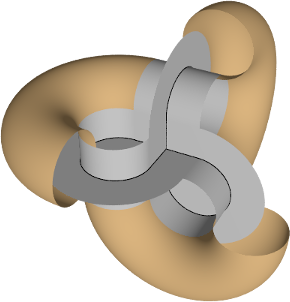
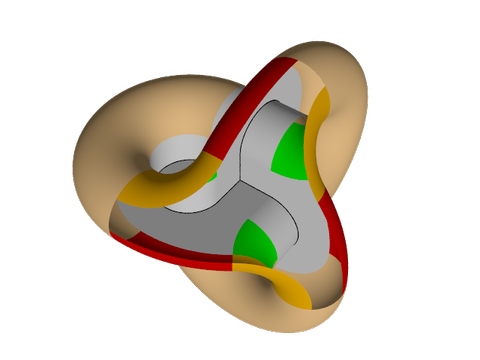
Now a miracle occurs and we can close the surface with a single spherical piece:
Neat, right? Well... maybe this deserves more explanations.
? When I first came to this point, I was not expecting that a single spherical piece would close the object smoothly. I just tried to put a specific piece of sphere to see what would be the remaining parts to fix or to close. It turned out that nothing was left to do. The choice was to take the (unique) sphere containing the open circular arc of one of the red piece and tangent to this red piece along this arc. Then, by accident, this sphere contains all 6 open arcs in the 3 red and 3 yellow pieces, and is tangent to these pieces along these arcs. Even accounting for the order 3 symmetry of the picture, this still requires many coincidences.
It was a good surprise, but it would be more satisfying to find a good explanation for this coincidence. And by this I do not mean: “just do the computations and you will see that it is true”. I mean: Is there a quick, elegant and generalizable justification? I have not found one, and I would be very interested if somebody could provide such.
There are many different ways each piece can be obtained by cutting and pasting simple primitives along simple curves. We let the reader choose a preferred construction and will describe the pieces in a parametric way. Sizes are given according to the scale that was chosen earlier.
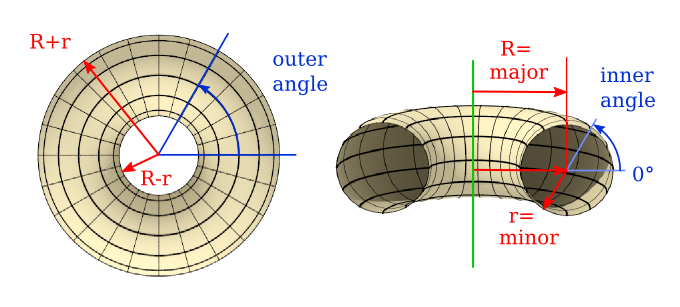
Let us parameterize the torus according to the following conventions.
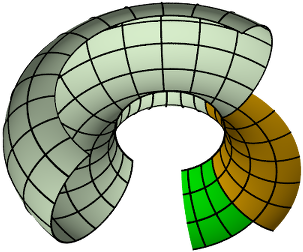
We will make use of the following angles (see their definitions in the text):
tan A=3/4, A≈36.87°, B=(270°-A)/2≈116.57°.
Pastel green pieces: major=2, minor=1, outer angle spans 180°, inner angle spans 270° from -90° to +180°.
Saturated green pieces: major=2, minor=1, outer angle spans A, inner angle spans 90° from 90° to 180°.
Yellow pieces: major=2, minor=1, outer angle spans 90°, inner angle spans B from 180°-B≈63.43° to 180°.
Those three pieces can be cut out of a single torus (on the following image, the bottom is up for more clarity).
Red pieces: major=4, minor=1, outer angle spans A, inner angle spans B from -90° to -90°+B≈26.57°.
Purple cylinders have height 2 and angle spanning 270°.

Planes are cut according to the following scheme (the size of the grid step is 1, the angle A is the same as above):

The sphere from which the last piece is cut has radius 1+2√5. Consider a coordinate system with orthogonal axes and with the same center as the sphere. The cuts consists in 6 arcs of circle, which come in two sets of three. Each set is made of images of a given circle by successive rotations by 120° exchanging the three axes of coordinate. Each circle in a set is tangent to exactly two circles in the other set. The arcs go from one tangent point to the next along each circle. One circle in one set is horizontal sits at height 2-cos(B)=2+1/√5. It has radius 4+2/√5. One circle in the other set is vertical, its radius is smaller: it is equal to the height of the previous circle and is is placed so that it is tangent to one of the big circles (see the picture). Its axis makes an angle of A with respect to one of the coordinate axes.
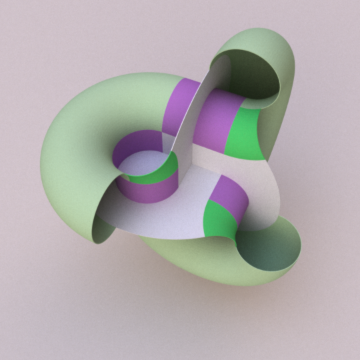
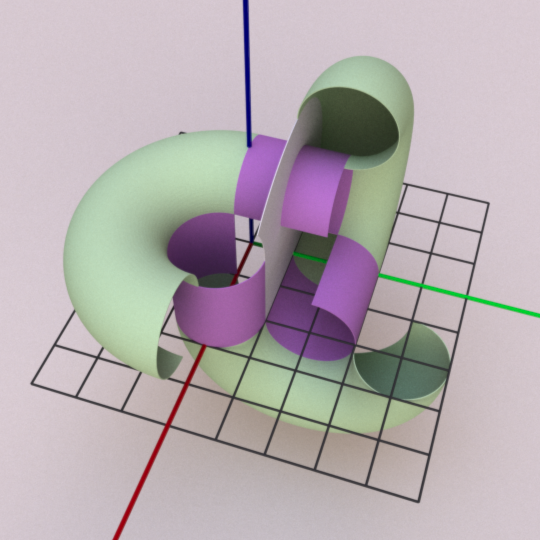
The previous pictures should make the assembly pretty straightforward. Here are a few more pictures (respecting the initial color scheme). The red green and blue axes correspond respectively to the x, y and z axes in (x,y,z)-coordinates.
Let us describe how the pieces are positioned in space, once assembled (this is useful for 3D rendering, for instance). We choose the same coordinate system as for the spherical part above: in particular the origin is the center of the sphere. Then the triple point (the point where the surface meets itself thrice) has coordinates (1,1,1). The following picture helps to situate some of the pieces with respect to this coordinate system (the grid has a step equal to 1):
Here are a few more hints:
Acknowledgements: Some images done with POV-Ray, some with Inkscape, others with the combination C++, Blender, Luxrender. Fonts by Google.